Friday, December 30, 2011

Drawing tool story: Drawing a sine or cosine curve

Introduction

I am posting a series of article of where I am demonstrating the building of a basic drawing tool. If you are interesting in reading the previous post you can read here

Today I am going to show you guys how to draw a sine or cosine curve, Bellow I have shared a screenshot to let the user know what I am up to. In the bellow drew 9 sine curve on various values for xmin and ymin.

image

I have putdown the code in a single class named “CustomLine” the whole code is given bellow and no need farther explanation, as the class is pretty simple and any one can understand it quickly. If anyone need any explanation please drop a comment, I would more than happy to edit the post to add explanation section.

CustomLine code listing

public class CustomLine
{
private double xmax = 6.5;
private double ymax = 1.1;
private Polyline _pl;
private readonly Canvas _graphControl;

public CustomLine(Canvas graphControl)
{
Ymin = -1.1;
_graphControl = graphControl;
_graphControl.SizeChanged += GraphControlSizeChanged;
Init();
_pl = new Polyline();
}

public bool IsCoSine { get; set; }

public bool Autoscale { get; set; }

public SolidColorBrush Stroke { get; set; }

public List<Point> CurvePoints { get; set; }

public double StrokeThickness { get; set; }

public double Width { get; set; }

public DoubleCollection StrokeDashArray { get; set; }

public int PointLength { get; set; }

public int StartLocation { get; set; }

public double Xmin { get; set; }

public double Ymin { get; set; }

public double Opacity { get; set; }

public bool ShowEffect { get; set; }

public Effect LineEffect { get; set; }

#region Private Functions

private void GraphControlSizeChanged(object sender, SizeChangedEventArgs e)
{
if (Autoscale)
{
CurvePoints.Clear();
DrawSine();
}
}

private void DrawLine()
{
if (IsCoSine == false)
{
DrawSine();
}
else
{
DrawCosine();
}
}

private void Init()
{
CurvePoints = new List<Point>();
Stroke = Brushes.Black;
Width = GetGraphWidth();
StrokeThickness = 2;
StrokeDashArray = null;
PointLength = 70;
StartLocation = 1;
Xmin = 0.1;
Opacity = 1;
ShowEffect = true;
LineEffect = new BlurEffect(){Radius = 2};
}

private void DrawCosine()
{
if (_pl != null)
_graphControl.Children.Remove(_pl);

for (var i = StartLocation; i < PointLength; i++)
{
var x = i / 5.0;
var y = Math.Cos(x);
var curvePoint = GetCurvePoint(new Point(x, y));
CurvePoints.Add(curvePoint);
}

if (_pl != null)
{
_pl.Width = GetGraphWidth();
_pl.Stroke = Stroke;
if (ShowEffect)
{
_pl.Effect = LineEffect;
}
_pl.Opacity = Opacity;
_pl.Points = new PointCollection(CurvePoints);
_graphControl.Children.Add(_pl);
}
}

private void DrawSine()
{
if (_pl != null)
_graphControl.Children.Remove(_pl);

for (var i = StartLocation; i < PointLength; i++)
{
var x = i / 5.0;
var y = Math.Sin(x);
var curvePoint = GetCurvePoint(new Point(x, y));
CurvePoints.Add(curvePoint);
}

if (_pl != null)
{
_pl.Width = GetGraphWidth();
_pl.Stroke = Stroke;
if (ShowEffect)
{
_pl.Effect = LineEffect;
}
_pl.Opacity = Opacity;
_pl.Points = new PointCollection(CurvePoints);
_graphControl.Children.Add(_pl);
}
}

private Point GetCurvePoint(Point pt)
{
var x = (pt.X - Xmin) * GetGraphWidth() / (xmax - Xmin);
var y = GetGraphHeight() - (pt.Y - Ymin) * GetGraphHeight() / (ymax - Ymin);
return new Point { X = x, Y = y };
}

private double GetGraphHeight()
{
return _graphControl.ActualHeight;
}

private double GetGraphWidth()
{
return _graphControl.ActualWidth;
}

#endregion

public void Draw()
{
DrawLine();
}
}


customline uses


Bellow the uses is given, note that I have used a canvas as graph control where any drawing surface can be used, but I feel comfortable as it uses basic functionalities of a drawing surface.


private void DrawPoliLineClick(object sender, RoutedEventArgs e)
{
var line = new CustomLine(GraphControl)
{
Stroke = new SolidColorBrush(Colors.Black),
Xmin = _xmin, Ymin = _ymin ,Opacity = 0.5
};
line.Draw();
_xmin += 0.2;
_ymin += -0.1;
}


Summery


In this short article we have seen how we can use a sine wave or cosine wave curve in WPF. Hope this would help someone some day. I would continue to list lots of drawing and interesting stuff regarding WPF drawing both in 2D and 3D in future post. Until next time bye bye.

Friday, December 23, 2011

Convert anything in online-convert

I was working on a html5 video player dialog in one of my project and I needed some sample video, After few minutes of research I found this awesome site which would help developers a lot when we in need of different file format of a same file.

image

Here is the direct link for the site. http://www.online-convert.com/. I used in case of converting videos. I hope everyone would be able to find something useful here.

Thursday, December 15, 2011

How to build xaml icons using basic objects?

introduction

Hi, I am no designer but some time we have to make some simple objects that can be used as icons, in one of my project I had to make some quick and rusty icons, didn’t know what to do then use some of the xaml’s basic objects to create icons, the screen shot bellow shows 4 icons that I made. The icons are not that much impressive but not that much bad either.
image
This give me lot of confidence on making xaml basic objects. Bellow I have shared the xaml markup that is been used to icon 3 and 4 from left to right.

xaml for icon of with x and y

<Style x:Key="button2Style" TargetType="Button">
    <Setter Property="Template">
        <Setter.Value>
            <ControlTemplate>
                <Grid>
                    <Rectangle StrokeThickness="0.5" Stroke="#232323" Cursor="Hand">
                        <Rectangle.Fill>
                            <LinearGradientBrush StartPoint="0,0" EndPoint="0,1">
                                <GradientStop Color="Silver" Offset="0.0" />
                                <GradientStop Color="Gray" Offset="1.0" />
                            </LinearGradientBrush>
                        </Rectangle.Fill>
                    </Rectangle>
                    <Grid>
                        <Grid.ColumnDefinitions>
                            <ColumnDefinition></ColumnDefinition>
                            <ColumnDefinition></ColumnDefinition>
                        </Grid.ColumnDefinitions>
                        <TextBlock Padding="5,4" Grid.Column="0">X</TextBlock>
                        <TextBlock Padding="5,4" Grid.Column="1">Y</TextBlock>
                    </Grid>
                    <Rectangle Width="0.5" Fill="Black" HorizontalAlignment="Center"></Rectangle>
                </Grid>
            </ControlTemplate>
        </Setter.Value>
    </Setter>
</Style>

xaml for icon of three black box

<Style x:Key="button3Style" TargetType="Button">
        <Setter Property="Template">
        <Setter.Value>
            <ControlTemplate>
                <Grid>
                    <Rectangle StrokeThickness="0.5" Stroke="#232323" Cursor="Hand">
                        <Rectangle.Fill>
                            <LinearGradientBrush StartPoint="0,0" EndPoint="0,1">
                                <GradientStop Color="Silver" Offset="0.0" />
                                <GradientStop Color="Gray" Offset="1.0" />
                            </LinearGradientBrush>
                        </Rectangle.Fill>
                    </Rectangle>
                    <Canvas>
                        <Rectangle StrokeThickness="0.5" Stroke="#232323" Width="12.5" 
                        Height="7" Fill="#696969" Margin="4,4,0,0">
                        </Rectangle>
                        <Rectangle StrokeThickness="0.5" Stroke="#232323" Width="12.5" 
                        Height="7" Fill="#696969" Margin="19,4,0,0">
                        </Rectangle>
                        <Rectangle StrokeThickness="0.5" Stroke="#232323" Width="12.5" 
                        Height="7" Fill="#696969" Margin="4,14,0,0">
                        </Rectangle>
                        <TextBlock Margin="20,2.5,0,0" Foreground="#232323" Padding="0" 
                        FontSize="15">...</TextBlock>
                    </Canvas>
                </Grid>
            </ControlTemplate>
        </Setter.Value>
    </Setter>
</Style>

Not bad right?. Yes using basic objects and effects we can make good looking objects that can be used as reusable objects. Note that I have used gradient effect and just few rectangle and text block to build these two icons.
Hope this will help some one, until next time, bye bye.

Friday, December 9, 2011

Drawing tool story: Switching between themes.

Introduction

In previous Drawing tool story series I have discussed about how to draw a simple line from c# code. Previous article can be found here http://munnaondotnet.blogspot.com/2011/11/drawing-tool-story-drawing-simple-line.html. In this short post we are going to take a look at how we can design theme based WPF application. The idea is pretty much same like asp.net theme switch.

Defining the theme

Changing theme is pretty simple we have do define the themes in a folder in our project and then change the themes in runtime by applying resource clear and merge. Bellow I have share a screen shot of solution explorer where its clearly seen that I have two theme in my project “Blend” and “Windows7” these are just names main styling is done in the Theme.xaml file.

image

Always use dynamic resource for themed application

For each instance of UI element that we want to style we can either add style or perhaps apply default look in the Theme.xaml so that it affect whole application. Bellow I have given a window xaml where its shown Lots of window element’s style is set to dynamic resource. This is the main trick of a themed application, if we apply static  resource this would require a direct reference of the style, where as in dynamic reference we don’t need it, the style may or may not be defined.

In case of dynamic resource style binding If any style is been defined with the style name that will be applied other wise if any default style is been found that would be applied.

<Window x:Class="WD.Shell.MainWindow"
xmlns="http://schemas.microsoft.com/winfx/2006/xaml/presentation"
xmlns:x="http://schemas.microsoft.com/winfx/2006/xaml"
Title="MainWindow" Height="450" Width="600" MinWidth="600" MinHeight="450">
<DockPanel Style="{DynamicResource WindowStyle}">
<Menu DockPanel.Dock="Top">
<MenuItem Header="File"></MenuItem>
</Menu>
<Border BorderBrush="#7F7F7F" Margin="20" Padding="2.5" BorderThickness="0.75">
<DockPanel>
<Border x:Name="panelContainer" DockPanel.Dock="Bottom"
Height="40" Margin="0,2,0,0" Style="{DynamicResource ToolPanelStyle}">
<StackPanel Orientation="Horizontal">
<Button Margin="5" Width="35" Height="25" Click="ButtonClick"
Style="{DynamicResource button0Style}"></Button>
<Button Margin="5" Width="35" Height="25" Click="ButtonClick"
Style="{DynamicResource button1Style}" ></Button>
<Button Margin="5" Width="35" Height="25"
Style="{DynamicResource button2Style}"></Button>
<Button Margin="5" Width="35" Height="25"
Style="{DynamicResource button3Style}"></Button>
<Rectangle Margin="10" Width="0.5" Fill="Black"/>
<Rectangle Width="0.5" Fill="Black" Margin="100,10,10,10"/>
<Button Margin="5" Width="80" Height="25"
Command="{Binding ApplyThemeCommand}"
CommandParameter="Blend">Blend</Button>
<Button Margin="5" Width="80" Height="25"
Command="{Binding ApplyThemeCommand}"
CommandParameter="Windows7">Windows 7</Button>
<Rectangle Margin="10" Width="0.5" Fill="Black"/>
</StackPanel>
</Border>
<Border Style="{DynamicResource CanvasContainerStyle}">
<Canvas x:Name="DrawingPanel" ClipToBounds="True"></Canvas>
</Border>
</DockPanel>
</Border>
</DockPanel>
</Window>


Change the theme


Last and most important part is switching the theme. Note that in above xaml I have added Two button and those are bind to command. In that command the main trick happens. Bellow the c# code is given.


private void OnApplyThemeCommand(object parameter)
{
var themeName = parameter as string;
var uriString = string.Format("/WD.Shell;component/Theme/{0}/Theme.xaml",themeName);
Dictionary.Source = new Uri(uriString, UriKind.Relative);
Application.Current.Resources.MergedDictionaries.Clear();
Application.Current.Resources.MergedDictionaries.Add(Dictionary);
}

Here I have changed the theme depending on what button is been pressed. First I have created a url for the theme directory and then clear existing resource the finally apply the new resource. That’s it theme is ready to switch dynamically with the single click on the window button.


Result in blend theme


image


result in windows7 theme


image


Conclusion


In this short article we have seen the basic idea behind themed application.

Thursday, December 1, 2011

A Simple Implementation of ICommand

MVVM pattern is kind of now an essential of building a WPF application, a very rich implementation is  of ICommand is DelegateCommand which came with Microsoft pattern and practice package enterprise library or prism framework also known as “Microsoft composite application block for WPF”. Bellow a simple implementation is given.

public class DelegateCommand : ICommand
{

public delegate void CommandOnExecute(object parameter);
public delegate bool CommandOnCanExecute(object parameter);

private readonly CommandOnExecute _execute;
private readonly CommandOnCanExecute _canExecute;

public DelegateCommand(CommandOnExecute onExecuteMethod,
CommandOnCanExecute onCanExecuteMethod)
{
_execute = onExecuteMethod;
_canExecute = onCanExecuteMethod;
}

#region ICommand Members

public event EventHandler CanExecuteChanged
{
add { CommandManager.RequerySuggested += value; }
remove { CommandManager.RequerySuggested -= value; }
}

public bool CanExecute(object parameter)
{
return _canExecute.Invoke(parameter);
}

public void Execute(object parameter)
{
_execute.Invoke(parameter);
}

#endregion
}

Bellow I have putdown the use of the DelegateCommand, note that this is not the class of prism, its hand written simple version, just named it DelegateCommand to make it looks like prism’s DelegateCommand.


public ICommand ApplyThemeCommand { get; set; }
public MainWindowPresenter()
{
Dictionary = new ResourceDictionary();
ApplyThemeCommand = new DelegateCommand(OnApplyThemeCommand, CanApplyThemeCommand);
}

private bool CanApplyThemeCommand(object parameter)
{
return true;
}

private void OnApplyThemeCommand(object parameter)
{
//code goes here
}

Xaml use is just like before simple binding with command object.


<Button Margin="5" Width="80" Height="25" 
Command="{Binding ApplyThemeCommand}"
CommandParameter="Blend">Blend</Button>
<Button Margin="5" Width="80" Height="25"
Command="{Binding ApplyThemeCommand}"
CommandParameter="Windows7">Windows 7</Button>

Hope this helps, until next time, Chow.

Friday, November 25, 2011

Drawing tool story: Drawing a simple line.

Hi I am going to write a drawing tool for one of my client in phases, I thought I can share some of the learning with the community as this is a far different project that I always did. All my projects and expertise some how related to data centric and data visualization.

However, now I have chance to explorer some of the WPF animation, drawing and other interesting things like 2d, and 3d objects. In this short post I would share few line of code from my actual project where I have done a demo on drawing a line on a  canvas.

image

In above example I have created a window to draw line upon the button clicks. Fairly simple and easy. Bellow the xaml definition is given.

image

Just a simple drawing surface named “DrawingPanel” which is a canvas. Bellow the c# code is given.

using System;
using System.Windows;
using System.Windows.Media;
using System.Windows.Shapes;

namespace Tool_Panel_Example
{
public partial class MainWindow
{
private double x1 = 10;
private double x2 = 200;
private double y1 = 10;
private double y2 = 200;
public MainWindow()
{
InitializeComponent();
}

private void ButtonClick(object sender, RoutedEventArgs e)
{
x1 = x1 + 10;
x2 = x2 - 10;

var element = new Line { Stroke = new SolidColorBrush(Colors.White),
X1 = x1, Y1 = y1, X2 = x2, Y2 = y2, StrokeThickness = 2 };

DrawingPanel.Children.Add(element);
}
}
}


Here I have first created a line element and then set its properties, here stroke and position and border thickness property is been set. Finally added in the drawing panel. Note that the position is been changed each time as we don’t want to keep the same object in same location.


I would continue to add more feature in the project and hopefully learn many things, and would definitely share with the community.

Thursday, November 17, 2011

KAXAML, another xaml editor for free!

As the heading suggests Kaxaml is a open source free xmal editor, it has split xmal and WPF deginer view, but the designer is so far view only all the editing has to be done in the xmal editor part.

You can download this from http://kaxaml.com/

image

It’s a small 1.7 mb package and comes with some handily features, you can create xaml for both wpf and Silverlight in single window side by side, note that there is no project concept only xmal document can be created and saved. However, it has some fair amount of intellisence.

image

By the way as no drag and drop feature is still here I would still prefer expression blend over this, and of course visual studio express editions and visual studio professional is far better as far as features are concern.

But for faster editing we can always use the Snippets tab for faster xmal writing. Lots of snippet is given there to help us do fast editing.

Never the less it’s a good tool to play with xaml.

Thursday, November 10, 2011

Export your illustrator object to XAML,”Making xmal icon is so easy now!”

Making XAML Icon and objects are not fairly easy!. Just found from the designer of our company that I can create a icon in illustrator and then directly export it to XAML and use it in our project. XAMLExport is a small plugin and worth trying, More over one very interesting thing is that its completely free!.

Here is where you can download the plugin.

http://www.mikeswanson.com/xamlexport/

image

Download and use it, you would love it. In future I would try to add a small tutorial to explain how we could be benefited from this plugin more, perhaps a guided tutorial to create a simple icon.

Tuesday, November 1, 2011

Sitefinity a full customizable CMS with good C# .net development.

Recently I worked in a project where we had to build a cms for a educational organization. There are couple of choices but end up with http://www.sitefinity.com/.

It’s a wonderful site, and has huge customization option. we can build custom control and easily integrate into the application. I would very much like to share more about Sitefinity in near future.

image

There is a huge set of tutorials is provided for the developers to work and get a good kick start. you guys can download this cms from [http://www.sitefinity.com] and play with it.

This have also a sdk so that we can develop our customized solutions. The sdk can be download from http://www.sitefinity.com/devnet/sdk.aspx.

In near future can would have a series of post to show the power of the tool.

Till then happy programming.

Monday, October 10, 2011

Keyboard selection on Silverlight ListBox and ComboBox

By default Silverlight combo box and list box does not support keyboard selection, so we need custom solution, “Mr Fons Sonnemans”  has done a fantastic job of achieving the behavior with adding behavior  to the controls.

Here is the original post “Keyboard selection on Silverlight ListBox and ComboBox

There is a sample project added with the post. its totally reusable and fantastic. We have used it in our project and also recommend that people should use it.

Thumbs Up  “Mr Fons Sonnemans” .

Monday, October 3, 2011

Add New Package source to NuGet Package Manager.

NuGet has surely reduced the maintaining the library package to some extent, we are using NuGet package manager quite often in our project. Recently I Needed a package which is not part of the NuGet Official package source. After a small research I found the solution and its been already published in many blogs in the internet.

Still sharing it, by default we have “https://go.microsoft.com/fwlink/?LinkID=206669” as a default NuGet Official package source. If you want to add additional repository you can always add it by adding more source in Package Sources, user can find this on Visual Studio 2010->Tools->Options-> Package Manager tab.

image

Above we have the option page where additional source can be added, just add a name and source url where the nuget package is published for a particular library.

Now you go to your project and right click on project reference and select manage nuget package, and a package manager will popup.

imageIn the above window you can see that I have added First Floor Software package as additional source.

Its truly a nice feature and making the management of software library a piece of cake.

Https with IIS 7~7.5, Testing asp.net application in https protocol

In this short blog I am going to share a pretty simple information and which can be very useful in some cases, and it is running asp.net application in https and testing it in locally.

Of Couse we have the option to use IIS Express and web matrix for that purpose. But I am going to share how we can do it using IIS.

First thing is that we have to transfer whole default web application’s binding to https.

image

Right click on the default Web site of  and select edit bindings, this will bring out the following window.

image

We can see where that https is already been configured, its because I have already configured it.  How click on add to add a new binding. This will bring another modal window.

image

In this window you have to select type == “Https” and select SSL certificate, we have used IIS Express Development Certificate, for testing but you can add your own certificate. How you can also choose to view the certificate information.

image

That’s it now click on ok to apply and dismiss the window. click on to ok to other opened window to apply the changes.

image

Now try browsing the same site using https protocol, for instance https://localhost/myapplication where my application is a normal asp.net application. And you would see the browser warning for the first time. Its because we have used a development certificate. click “Continue to this website” to continue.

Sunday, October 2, 2011

“Silverlight SPY” for firebug or snoop like tool for Silverlight

In this blog I am going to share one yet another interesting tool developed by “firstfloorsoftware”, and the tool is “Silverlight SPY” It’s a simple wonderful tool for UI debug, in fact you can see the dom and highlight particular section.

image

One demoralizing thing is that this is not a free tool, its available only in commercial tool. Its available for only evaluation.

But if we don’t need for debug the UI rather need to watch the inner anatomy of controls and customize it, I would say Expression blend is also handy.  But again expression blend is also not free Open-mouthed smile. In fact to be frank Visual Studio is also not free Open-mouthed smile.

Tell Next time. Me “Munna” Signing out.

Display XPS document In Silverlight

Today I am going to share a very useful tool named “DocumentViewer”, it’s a Silverlight control which allow users to display documents as XPS document. There are lots of supporting control associated with “DocumentViewer”, for instance view mode which deals with document’s zoom factor, navigation and off course thumb nail view, etc.

image

One key thing is that this control is commercial, so we need to pay for using it. But its free to try. We have developed a application with shows different types of document via this control, and so far the impression is very satisfactory.

I wonder whey some thing would be available with built in Silverlight control set.

Saturday, October 1, 2011

Using WCF Service with Silverlight

Introduction

In one of our products, we had to use WCF service with Silverlight. While working on Silverlight and WCF, I found out some very interesting things and I feel that those are worth sharing. Whenever we want to work with Silverlight and need some kind of service communication, we would encounter those common problems. In this article, we are going to discuss a few interesting findings about WCF and Silverlight Bridge.

For the purpose of demonstration, we are going to use a demo application with some simple class. Let's say we have an expense management application and we have a client build with Silverlight. And the client communicated to server via WCF. Let's take this example to fit our explanation process.

Using WCF with Silverlight

In this section, we will see how we can use WCF service with Silverlight. I am sure every reader has a nice grip on what is WCF and how we can use it in web applications. Some of the stuff is repeated and discussed again and may sound familiar. But as we need some parts as a subset, I am discussing it again. First, we would look at the basics and then we would see some other relevant tricks and information.

The WCF Basics

WCF has three basic building blocks. Those are called A,B,C of WCF. A stands for Address, B stands for Binding and C stands for contract. In a later section, we would see the most common knowledge that is necessary to work with WCF, of course communication with Silverlight context. WCF can be hosted in several ways. Most common ones are given below:

  • Hosting in Internet Information Services
  • Hosting in Windows Process Activation Service
  • Hosting in a Windows Service Application
  • Hosting in a Managed Application

We are not going to discuss about the above hosting options in this article as those need further study, and assumes to not be the focused area of the article. I would recommend that you spend some time on MSDN or Google to learn more about WCF hosting process.

The Service Contract and Operation Contract

I am sure we all know what a service contract is, but I am still discussing it as it is a beginner article. We make any class a service contract by adding one simple class attribute "[ServiceContract]" but it's better to declare an interface first and then apply class attribute to that interface and then implement class in a derived class. Now the methods that we would want to expose as part of the service need to be decorated with a method attribute named "[OperationContract]".

Below we have a code block with an interface that has been declared as a service contract and then we have implemented a derived class from the interface to define the methods that would be invoked via clients.

Service Contract

[ServiceContract]
public interface IMoneyService
{
[OperationContract]
ServiceResponse AddExpense(Expense expense);
[OperationContract]
ServiceResponse UpdateExpense(Expense expense);
[OperationContract]
ServiceResponse DeleteExpense(Expense expense);
[OperationContract]
ServiceResponse GetExpenseByID(int expenseId);
[OperationContract]
ServiceResponse AddCategory(Category category);
[OperationContract]
ServiceResponse UpdateCategory(Category category);
[OperationContract]
ServiceResponse DeleteCategory(Category category);
[OperationContract]
ServiceResponse GetCategoryByID(int categoryId);
}

Implementation of the Contract

[AspNetCompatibilityRequirements
(RequirementsMode = AspNetCompatibilityRequirementsMode.Allowed)]
public class MoneyService : IMoneyService
{
public ServiceResponse AddExpense(Expense expense)
{
var response = new ServiceResponse();
using (var manager = new ExpenseManager())
{
try
{
response.Result = manager.AddExpense(expense);
response.IsSuccess = true;
}
catch (Exception exception)
{
response.ServiceException = exception;
response.IsSuccess = false;
response.ErrorMessage = "Unable to add Expense";
}
}
return response;
}

///Other method's implementation.... goes bellow
///....
}

In the above example, we didn't put down all the implementation in one method to demonstrate the idea.


The Data Contract


If we want to transfer custom data via WCF from server to client, we have to apply "[DataContract]" class attribute on the custom data type. Besides, all primitive datatypes can be used as a transferable data. Below we have added a simple class that we have used as our custom type to transfer data from service to client.


You might need to use KnownType attribute in case you have nested custom type in your data contract.

[KnownType(<span style="COLOR: blue">typeof</span>(your-custom-type))]

Below, a sample Data contract implementation is given.

[DataContract]
public class ServiceResponse
{
private string _errorMessage;
[DataMember]
public string ErrorMessage
{
get { return _errorMessage; }
set { _errorMessage = value; }
}
private object _result;
[DataMember]
public object Result
{
get { return _result; }
set { _result = value; }
}
private bool _isSuccess;
[DataMember]
public bool IsSuccess
{
get { return _isSuccess; }
set { _isSuccess = value; }
}
private Exception _serviceException;
[DataMember]
public Exception ServiceException
{
get { return _serviceException; }
set { _serviceException = value; }
}
}

ASP.NET Compatibility


This particular scenario is very useful if we host the WCF service in the IIS environment. The idea is to share the same HttpContext in service methods and inner methods so that we can access session and application data of the web application where the WCF service is being exposed.

var context = HttpContext.Current;
var path = context.Server.MapPath("~/MyPics");

if (!Directory.Exists(path))
{
Directory.CreateDirectory(path);
}

var userFolder = string.Format("{0}\\{1}", path, userId);

if (!Directory.Exists(userFolder))
{
Directory.CreateDirectory(userFolder);
}

In the above example, we want to find a folder name "MyPics" where the pictures of a particular user will be saved. So we need the httpContext where the service is running.


Below, the service configuration is given. The key stuff is the tag "serviceHostingEnvironment" we have to set the attribute aspNetCompatibilityEnabled="true".

    <system.serviceModel>
<behaviors>
<endpointBehaviors>
<behavior name="PEM.MoneyTrackingServiceAspNetAjaxBehavior">
<enableWebScript />

</behavior>
</endpointBehaviors>
</behaviors>
<serviceHostingEnvironment aspNetCompatibilityEnabled="true"
multipleSiteBindingsEnabled="true" />

<services>
<service name="PEM.MoneyTrackingService">
<endpoint address=""
behaviorConfiguration="PEM.MoneyTrackingServiceAspNetAjaxBehavior"
binding="webHttpBinding" contract="PEM.MoneyTrackingService" />

</service>
</services>
</system.serviceModel>

After that, we have to put the AspNetCompatibilityRequirements class attribute with value RequirementsMode = AspNetCompatibilityRequirementsMode.Allowed to the desired service contract implementation. Note that this attribute cannot be added before the interface which is the contract. We have to add it before the service contract implementation.

[ServiceContract(Namespace = "")]
[AspNetCompatibilityRequirements
(RequirementsMode = AspNetCompatibilityRequirementsMode.Allowed)]
public class MoneyTrackingService
{
[OperationContract]
public void DoWork()
{
return;
}
}

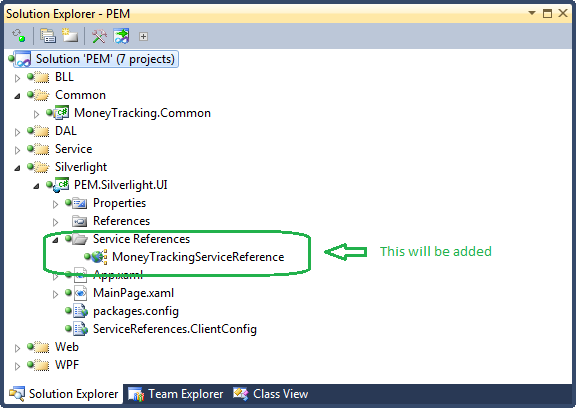
Adding Service Reference to Silverlight


Alright. We have the basics on our finger tip, now it's time to make the service workable. Here are the steps we have to do.


  • Step 1: Define Data Contract that we want to transmit via service. Add "[DataContract]" class attribute to class and "[DataMember]" property attribute to properties. If we have any enum in the DataContract we have to apply EnumMember attribute.
  • Step 2: Define interface for ServiceContract with methods, add service contract attribute. mark each method that we want to expose to OperationContract.
  • Step 3: Define a derived class for ServiceContract implementation. Add the necessary class attribute if we need ASP.NET compatibility.
    In our case, we have defined those classes and interface in a separate project named MoneyTracking.Service.
  • Step 4: Add a reference to the project where we defined the classes. If we defined all the classes and interfaces in the web project, then no worries.
  • Step 5: Add a svc file. Get rid of the "cs" file. Modify the XML for the .svc file. put down the proper service name.
     <%@ ServiceHost Language="C#" Debug="true" 
    Service="full Qualified name goes here" %>

  • Step 6: Define proper service definition in service model tag of web.config. We have defined the XML in the previous section, we can also copy from there. Note that we should at mex binding as well.
  • Step 7: Browser the service to see if everything is working fine or not.
  • Step 8: Go to the Silverlight project where we want to consume the service, right click on the project's reference node and select add Service Reference, which will bring the configure add service reference wizard. Rest of the work is self explanatory in the wizard.

When you finished adding the service, you will have a service reference node where the service will be added. Visual Studio also adds lots of code behind the scenes, an also a ServiceReferences.ClientConfig file. We will see the uses in later sections.


ServiceReferences.ClientConfig

<configuration>
<system.serviceModel>
<bindings>
<basicHttpBinding>

<binding name="BasicHttpBinding_IMoneyService" maxBufferSize="2147483647"
maxReceivedMessageSize="2147483647">
<security mode="None" />

</binding>
</basicHttpBinding>
</bindings>
<client>
<endpoint address="http://localhost/MoneyTrackingService.svc"
binding="basicHttpBinding"
bindingConfiguration="BasicHttpBinding_IMoneyService"

contract="MoneyTrackingServiceReference.IMoneyService"
name="BasicHttpBinding_IMoneyService" />
</client>
</system.serviceModel>
</configuration>

Using the Channel Factory


So far, we have three ways to use a WCF service in Silverlight:


  • Using a service reference
  • Using chanel Factory
  • Using Client base

Below, we have explained how the chanel factory can be used to define a WCF service in Silverlight side. Note that in this case, we don't have to use any sort of reference for the service. But how? Silverlight only allows asynchronous model of service method call, so we cannot use the same OperationContract. We can copy all the classes that are DataContract as a link and use in the Silverlight project, for the service contract we have to define a new class with ServiceContract attribute. Note that the methods need to have [OperationContract(AsyncPattern = true)] method attribute. For each method in the ServiceContract in server, we have to define two methods with pre-fix "Begin" and "End" so if we have a method named "AddExpense" in server, in the client class we have to define two methods named "BeginAddExpense" and "EndAddExpense". Below, a complete code has been given for the class IMoneyService of client.


Example of AnyncPattern Contract

namespace MoneyTracking.Service
{
[ServiceContract]
public interface IMoneyService
{
[OperationContract(AsyncPattern = true)]
IAsyncResult BeginAddExpense
(Expense expense, AsyncCallback callback, object state);

[OperationContract(AsyncPattern = true)]
IAsyncResult BeginUpdateExpense
(Expense expense, AsyncCallback callback, object state);

[OperationContract(AsyncPattern = true)]
IAsyncResult BeginDeleteExpense
(Expense expense, AsyncCallback callback, object state);

[OperationContract(AsyncPattern = true)]
IAsyncResult BeginGetExpenseByID
(int expenseId, AsyncCallback callback, object state);

[OperationContract(AsyncPattern = true)]
IAsyncResult BeginAddCategory
(Category category, AsyncCallback callback, object state);

[OperationContract(AsyncPattern = true)]
IAsyncResult BeginUpdateCategory
(Category category, AsyncCallback callback, object state);

[OperationContract(AsyncPattern = true)]
IAsyncResult BeginDeleteCategory
(Category category, AsyncCallback callback, object state);

[OperationContract(AsyncPattern = true)]
IAsyncResult BeginGetCategoryByID
(int categoryId, AsyncCallback callback, object state);

ServiceResponse EndAddExpense(IAsyncResult result);

ServiceResponse EndUpdateExpense(IAsyncResult result);

ServiceResponse EndDeleteExpense(IAsyncResult result);

ServiceResponse EndGetExpenseByID(IAsyncResult result);

ServiceResponse EndAddCategory(IAsyncResult result);

ServiceResponse EndUpdateCategory(IAsyncResult result);

ServiceResponse EndDeleteCategory(IAsyncResult result);

ServiceResponse EndGetCategoryByID(IAsyncResult result);
}
}

Example of chanelFactory


Now we have defined the interface. It's time to build the service using ChanelFactory. Below a simple code is given to demonstrate how we can create a service client and invoke a method.

private void UsingChanelFactory(object sender, RoutedEventArgs e)
{
var basicHttpBinding = new BasicHttpBinding();
var endpointAddress = new EndpointAddress
("http://localhost/MoneyTrackingWeb/MoneyTrackingService.svc");
var moneyService = new ChannelFactory
<moneytracking.service.imoneyservice>

(basicHttpBinding, endpointAddress).CreateChannel();
moneyService.BeginAddCategory
(new MoneyTracking.Common.Category(), ASyncronousCallBack, moneyService);
}

private void ASyncronousCallBack(IAsyncResult ar)
{
if(ar.IsCompleted)
{
MoneyTracking.Common.ServiceResponse serviceResponse =
((MoneyTracking.Service.IMoneyService)ar.AsyncState).EndAddCategory(ar);
if(serviceResponse.IsSuccess)
{
//do your work here
}
}
}

Making Synchronous Call


By default, the methods that we have in service client in Silverlight are asynchronous method calls. A simple code is given below to demonstrate the idea. A Client has been initiated and then a completed event has been subscribed to and then call the asynchronous method.


Example of Asynchronous call

public void AddExpense()
{
var client = new MoneyServiceClient();
var category = new Category();
//fill category attributes here
client.AddCategoryCompleted += ClientAddCategoryCompleted;
client.AddCategoryAsync(category);
}

void ClientAddCategoryCompleted(object sender, AddCategoryCompletedEventArgs e)
{
ServiceResponse serviceResponse = e.Result;
if(serviceResponse.IsSuccess)
Categories.Add((Category) serviceResponse.Result);
}

Example of Synchronous Call


In some scenarios, we need to have a synchronous call, since Silverlight does not allow the synchronous call we can always bypass and use the same system in such a way so that we have a synchronous call, the idea is to stop the current code execution until the completed event is been fired.


We have defined a custom class AsyncCallStatus<T> a custom status which will be passed via Async Method. But the magic class which make all this possible is "AutoResetEvent", we have the current execution freeze using _autoResetEvent.WaitOne(). When in completed event, we get the result back we simply set the  _autoResetEvent.Set(); which again resumes the process.


Note that in Silverlight 4, we have to use ThreadPool.QueueUserWorkItem(MethodNameGoesHere); to start the process otherwise AutoResetEvent.WaitOne() will stop the current tread execution, and completed event won't fire at all, in fact call the server will never be invoked. Below, we have put down the complete listing of a method called synchronously.

private void SyncronousCall(object sender, RoutedEventArgs e)
{
ThreadPool.QueueUserWorkItem(AddExpenseInServer);

}

private void AddExpenseInServer(object state)
{
Expense addedExpense = AddExpense();
Dispatcher.BeginInvoke(() =>
{
StatusMessage.Content = "Expense is been Added";
Expenses.Add(addedExpense);
});
}

private Expense AddExpense()
{
var asyncCallStatus = new AsyncCallStatus<AddExpenseCompletedEventArgs>();
var client = new MoneyServiceClient();
client.AddExpenseCompleted += ClientAddExpenseCompleted;
client.AddExpenseAsync(new Expense(),asyncCallStatus);
_autoResetEvent.WaitOne();
if (asyncCallStatus.CompletedEventArgs.Error != null)
{
throw asyncCallStatus.CompletedEventArgs.Error;
}
var serviceResponse = asyncCallStatus.CompletedEventArgs.Result;
if (serviceResponse.IsSuccess)
{
return serviceResponse.Result as Expense;
}
else
return null;
}

void ClientAddExpenseCompleted(object sender, AddExpenseCompletedEventArgs e)
{
var status = e.UserState as AsyncCallStatus<AddExpenseCompletedEventArgs>;
if (status != null) status.CompletedEventArgs = e;
_autoResetEvent.Set();
}

private readonly AutoResetEvent _autoResetEvent = new AutoResetEvent(false);

public class AsyncCallStatus<T>

{
public T CompletedEventArgs { get; set; }
}

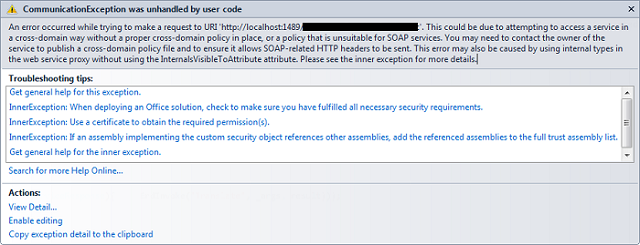
Cross Domain Service Call


By default, Silverlight can invoke any method from the originator site. So if the Silverlight component is invoked from "http://mytestside.com/silverlightTestPage.aspx", the component can call any WCF service hosted in "http://mytestside.com/testservice.svc". But let's say we want to call a WCF service which is hosted on "http://myotherside.com/otherservice.svc", we would encounter an error something like this:


The way to archive cross domain service call in Silverlight is pretty simple in fact. We have to put two XML files named "clientaccesspolicy.xml" and "crossdomain.xml" file in root folder of the service. So if we have a service named "http://mytestserver.com/myservice.svc", we need to put down those two files in "http://mytestserver.com/clientaccesspolicy.xml". Both the file and its content are given below.


clientaccesspolicy.xml

<?xml version="1.0" encoding="utf-8" ?>
<access-policy>
<cross-domain-access>

<policy>
<allow-from http-request-headers="SOAPAction">
<domain uri="*"/>
</allow-from>
<grant-to>

<resource path="/" include-subpaths="true"/>
</grant-to>
</policy>
</cross-domain-access>

</access-policy>

crossdomain.xml

<?xml version="1.0" ?>
<!DOCTYPE cross-domain-policy SYSTEM
"http://www.macromedia.com/xml/dtds/cross-domain-policy.dtd">
<cross-domain-policy>
<allow-http-request-headers-from domain="*" headers="SOAPAction,Content-Type"/>

</cross-domain-policy>

You can simulate the crossdomain class in the local environment also. For this, modify the host file:

127.0.0.1 testserver.com 
127.0.0.1 testclient.com

Now you can run your project from testclient and service will be consumed from testserver.


Transfer Large Data


In this section, we would see how we can customize the WCF service so that we can transfer large amount of data. We often encounter an error while communicating that max limit of array size has been crossed or perhaps an exception that endpoint not found, it's simply because there could be a size issue. Note that the endpoint not found exception can occur for many reasons.


To overcome the limitation, we need to customize the basicHttpBinding. We have to define a bindings section under <system.servicemodel> and under that we would customize the basicHttpBinding. For this, we have to create another sub section under binding named "<basicHttpBinding>". Here we can put multiple bindings and of course we can set all the advanced attributes.


Below, we have put down both client and server configuration.


Service Configuration on Server

<system.serviceModel>
<serviceHostingEnvironment multipleSiteBindingsEnabled="true"
aspNetCompatibilityEnabled="true"/>

<bindings>
<basicHttpBinding>
<binding name="MoneyTrackingServiceBinding" maxBufferPoolSize="2147483647"
maxBufferSize="2147483647" maxReceivedMessageSize="2147483647">

<readerQuotas maxDepth="2147483647" maxStringContentLength="2147483647"
maxArrayLength="2147483647" maxBytesPerRead="2147483647"
maxNameTableCharCount="2147483647">
</readerQuotas>

</binding>
</basicHttpBinding>
</bindings>
<behaviors>
<serviceBehaviors>
<behavior name="MoneyTrackingServiceBehavior">

<serviceMetadata httpGetEnabled="true" />
<serviceDebug includeExceptionDetailInFaults="false" />
</behavior>
</serviceBehaviors>

</behaviors>
<services>
<service name="MoneyTracking.Service.MoneyService"
behaviorConfiguration="MoneyTrackingServiceBehavior">
<endpoint address="" binding="basicHttpBinding"

bindingConfiguration="MoneyTrackingServiceBinding"
contract="MoneyTracking.Service.IMoneyService" />
<endpoint address="mex" binding="mexHttpBinding" contract="IMetadataExchange"/>

</service>
</services>
</system.serviceModel>

Here under service, we have added behaviorConfiguration to "" in service and under that in endpoint section we have also set "bindingConfiguration" to our desired configuration name.


Client Side Configuration

<configuration>
<system.serviceModel>
<bindings>
<basicHttpBinding>
<binding name="MoneyTrackingServiceBinding" maxBufferSize="2147483647"

maxBufferPoolSize="2147483647" maxReceivedMessageSize="2147483647" />
</basicHttpBinding>
</bindings>
<client>

<endpoint address="http://localhost/MoneyTrackingWeb/MoneyTrackingService.svc"
binding="basicHttpBinding"
bindingConfiguration="MoneyTrackingServiceBinding"
contract="MoneyTrackingServiceReference.IMoneyService"
name="BasicHttpBinding_IMoneyService" />

</client>
</system.serviceModel>
</configuration>

The above service configuration section is for the client, note that both server and client binding configuration name should match and the value should also match. In client service configuration fine we don't have to define the "readerQuotas", infact that would give you an exception. And we don't need behaviour configuration. You guys can also copy and paste the above configurations in your context, while doing so you have to fix the contract names and service names.


Summary


In this short article, we have seen the basics of WCF service. We have discussed only those parts that are necessary to build a simple WCF service that can be consumed by a Silverlight client. Then we have seen two ways of creating a client proxy for Silverlight. We can add service reference and also can use chanel factory to build client. Chanel factory gives more control over client proxy.


After that, we have seen how we can use some small policy XML files to extend the service so that it can be consumed via Silverlight components running in a different domain. Lastly, we have seen how we can customize the binding to support large amount of data transfer. There are lots of challenges in real life development regarding WCF and Silverlight. I hope to put together more content in a future article.


References


History


  • 29th September, 2011: Initial version